Introduction:
Cisco switches are administrator devices suitable for businesses needing flexibility, security, and power to connect to large networks. Unlike ordinary plug-and-play devices, Cisco switch configuration requires an initial setup via an interface, followed by constant monitoring and maintenance.
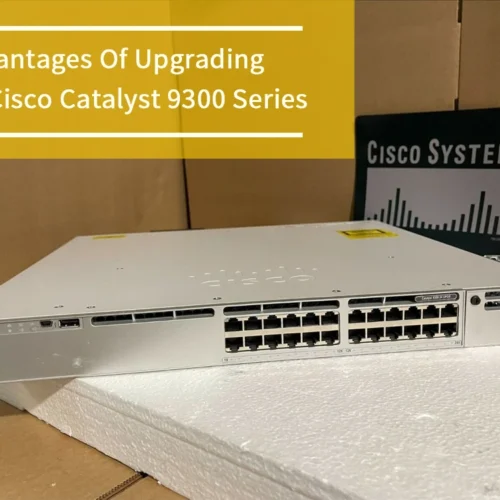
This article will quell your curiosity by showing you how to configure a Cisco switch using the popular Catalyst series from scratch. Because this series utilizes the IOS operating system, we will configure Cisco switches with the famous IOS Command-Line Interface.
How To Configure a Cisco Switch?
Here, you will see the Cisco switch configuration step by step.
1. Inspect and Connect To Your Hardware
In our “how to configure a Cisco switch” guide, the first step in configuring a Cisco switch is knowing the hardware. When unplugged, inspect the power cables along with the console and switch ports for damage. Every Cisco switch comes with built-in LEDs that depict the current state of your switch. You may proceed to plug your switch if the cables look good, but first, ensure that the indicator lights are operational.
Follow the guide below:
a. Connect the power cable to an electric source and wait until the lights come on.
b. Check the anterior portion of the switch and observe the System’s LEDs (SYST).
- Off – this means that the system is not powered. Examine the power source or power cable for defects if the LEDs are off while the cables remain connected.
- Flashing Green – this means the system’s software is loading
- Green – this means that the switch is operational
- Flashing Amber – this means an error with either the network module, fan, or power supply
- Amber – this means there’s power, but the system is non-functional
c. Apart from the above SYST, you should notice other lights like Stack, Duplex, Console, RPS, etc
d. Check the switch’s posterior. The power supply and console port should be visible, which could be either Serial or Mini USB.
e. Additionally, an IOS label on the back should reveal the default OS version.
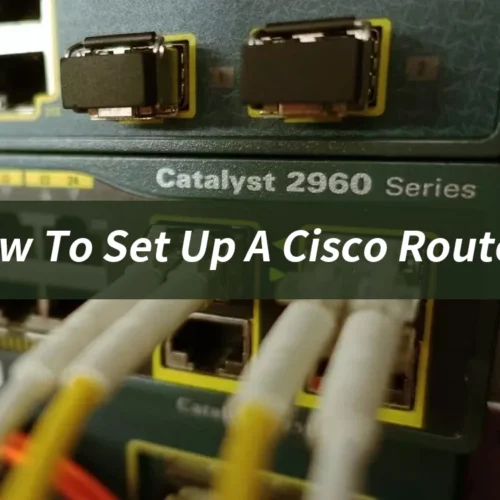
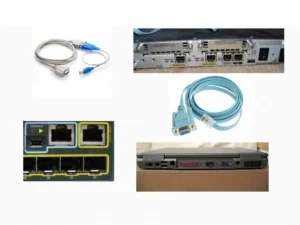
Connecting To a Cisco Switch
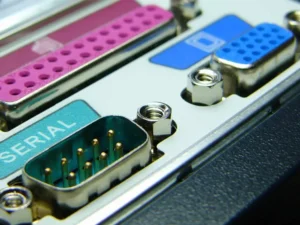
First, connect the console/rollover cable to the console. There are two mainstream cable adapters; a USB/Serial DB-9 adapter which is suitable for computers without a serial port, and a Serial DB-9/Ethernet RJ45 console cable.
Either of these cables applies to Cisco switches with particular console parts.
After that, you will need to connect your laptop or personal computer to the console port.
Do this by plugging the serial DB9 end of the console into the computer’s serial port before connecting the RJ45 end to the Cisco switch.
Alternatively, connect the serial DB9 cable end to the Serial-to-USB adapter before hooking it to your laptop. This option is viable if your device lacks a serial DB-9 port.
2. Establish a Serial Connection
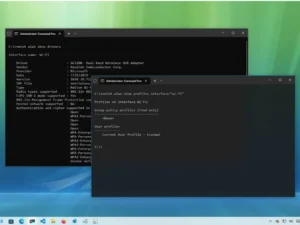
The next step in how to setup a Cisco switch is to establish a serial connection with your computer. This process requires software that controls serial lines.
PuTTy is a commonly used software in this case. It is a free-license SSH, login, Telnet, and TCP client. However, because Windows only support the software, individuals using Linux or Mac OS should substitute with MobaXTerm and SecureCRT.
- If you run windows, first install PuTTy on your computer device. People using a different operating system should download an alternative to PuTTy.
- Open the software (PuTTy) if the console cable is correctly attached to your switch and computer.
- Confirm the COM port number if you have connected the switch’s serial to the USB port with an adapter.
- Do this by checking your USB connections in the Windows Device Manager.
- Now configure PuTTy’s serial lines by going to connection>serial.
Set the following port parameters in this menu:
- Connect to COM # Serial line. This is what you found previously.
- Speed (baud). Between 9600 – 115200 (bps). This number differs among the series.
- Data bits: set to 8 data bits
- Stop bits: set to 1 stop bit
- Parity: set parity to none
- Flow control: default or none
After following these steps, save your correction and click open. You are now connected and ready to configure a switch.
3. Move Through The Command Modes
When you’ve connected to the switch, you’ll meet with the prompt – Switch>.
“Switch” is the hostname and the current name of your switch. The symbol “>,” on the other hand, indicates that you’re in unprivileged command mode.
This mode allows you to display information but not alter any configuration. To proceed with the Cisco switch configuration, you will have to scale your user privileges.
Two privilege level modes exist in Cisco’s command:
a. The “unprivileged” User EXEC – in this mode, “>” is the default. However, you can only detect and display some debug information.
b. The “privileged” User EXEC – “#” is the configuration mode.
Use the following to move through these command modes:
- Enable – Shift from unprivileged to privileged
- Disable – Shift from privileged to unprivileged
- Exit – Return one mode
- End – Return to enable mode
4. Configure Suitable Hostname
Move to “#” mode by typing enable and then to configuration mode using “configure terminal” or “config t.”
After that, issue the following command under configuration mode:
Switch (config) # hostname <name>
Observe how “switch” changed to the name you gave it.
Switch > enable
Switch # config t
Switch (config)# hostname <name>
Name (config) #
*Note: “name” will be our hostname henceforth.
5. Configure Initial Security
Protect the # EXEC mode with a password:
To set your password, use “enable secret <your password>” in the global configuration mode.
Name (config)# enable secret PASSWORD
If you want to test your progress, return to the unprivileged EXEC User mode (>) and access the “#” mode again with “enable.” You’ll notice that a password now protects the first line of the switch.
6. Configure Management Interface and Gateway
a. Configuring Management Interface IP
After coming this far in configuring Cisco switches, your next step is to set up a management interface.
If your computer and switch share the same network, you can create a Switched Virtual Interface (SVI) and assign an IP address.
Name (config) # interface VLAN 1
Name (config-if) # ip address <ip address> <mask>
Name (config-if) # exit
b. Assign the Default Gateway
Network switch configuration should be done with a default router to make it accessible from a remote network.
Not configuring a default gateway will prevent VLAN1 from sending traffic to another network.
Issue the command below and remember to test the connectivity with the “Ping” command.
Name (config) # up default – gateway <ip address>
7. Inhibit Switch Access
A vital step in how to configure Cisco switches is enhancing security.
Your Cisco switch setup is vulnerable if you don’t add some extra layers of security.
To protect your switch from every threat, you have to set passwords for every input connection. This includes the console, Telnet, and Aux ports.
Employ the following commands:
- To find your switch’s current connection lines (CL)
Name> show running-config - To determine your switch’s current CL and their numbers
Name> show line - To configure a password for the console line
Name (config) # line Con 0
Name (config-line) # password SECRET CONSOLE
Name (config-line) # login
Name (config-line) # exit - To configure the password for vty line
Name (config) # line vty 0 4
Name (config-line) # passwords SECRTSS
Name (config-line) # login
Name (config-line) # exit
After configuration, re-run the command to verify your configuration;
Name > show running-config
Create an ACL to Prevent Unauthorized Access at the IP Level
Another way to improve the security of your switch is to create an ACL (access control list) and incorporate the IP address you permit or prohibit from accessing your switch.
After creating the ACL, you may assign it to the VTY line. This will grant you immense control, allowing a maximum of two IPs to access your switch.
Name (config) # up access – list <number> <permit|deny> <ip address> <wildcard>
Name (config) # line vty 0 4
Name (config-line) # access – class <access – list number> in
Name (config-line) # exit
Disable Unnecessary Switch Ports or Assign a Blackhole VLAN
Even though this is not a necessary step in this “How to configure a Cisco Switch” guide, it is still a good security practice.
You should disable every unused port using the “shutdown” command.
For example, if your switch has forty switch ports and you don’t want to use 15 to 40:
Name (config) # interface range fa 0/15-40
Name (config-if-range) # shutdown
Name (config-if-range) # exit
Name (config) #
Likewise, you can shut down your switch ports by generating a “black hole VLAN” and allocating them to unnecessary ports.
Generally, you can assign used or unused switch ports to any VLAN, excluding VLAN1.
This is because your user broadcast or multicast traffic might be exposed if any port remains enabled on the default VLAN1.
Name (config) # vlan 999
Name (config-VLAN) # name Blackhole
Name (config-VLAN) # exit
Name (config) # interface range fa 0/15-40
Name (config-if-range) # switch port access VLAN 999
Name (config-if-range) #switchport mode access
Name (config-if-range) # exit
8. Configure VLANs and Access Ports
To quickly build a series of VLANs, use the “VLAN database” command and use “show VLAN switch” to see what VLANs you’ve built.
How to Configure VLAN on Cisco Switch:
Name (config) # vlan 2
Name (config – vlan) # name Admin
Name (config – vlan) # exit
Name (config) # vlan 3
Name (config – vlan) # name Users
Name (config – vlan) # exit
Next, to each VLAN, assign a switch port:
Name (config) # interface range fa 0/1-3
Name (config-if-range) # switch port mode access
Name (config-if-range) # switch port access vlan2
Name (config-if-range) # exit
Name (config) # interface range fa 0/4-17
Name (config-if-range) # switch port mode access
Name (config-if-range) # switch port access VLAN 3
Name (config-if-range) # exit
9. How to Configure Port Channel in Cisco Switch
Port channels combine separate interfaces into groups to increase bandwidth and redundancy.
A port channel is created by building compatible interfaces and is configured in two ways. One is in a switch profile mode, and another is in global configuration mode.
Follow the commands below to create a port channel:
I. Name # configure terminal
This command functions for entering global configuration mode.
II. Name (config) # interface port-channel channel number
This indicates which PC interface to configure and enters the interface config. mode.
III. Switch (config) # no interface port-channel channel number
This removes the port channel and deletes related channel groups.
Conclusion: How to Configure a Cisco Switch
Although it isn’t mandatory to configure your switch before using it, you might want to change a few parameters and customize the device to your needs.
You can complete simple tasks like setting a password and creating ACLs; however, this is just half the work.
Cisco switches still require regular monitoring and maintenance to function properly.
So, despite your impatient curiosity about how to configure Cisco switches, make sure you go through the process calmly and diligently.
A properly configured switch will grant you safe online communication and peace of mind.